Because i did not have any management panel for my server like (cPanel, Plesk,…etc) I always install any SSL certificate for my websites using the SSH way, and I will till you how you in the coming lines.
I host all my websites on Linux VPS hosting, using the LEMP (Linux-Nginx-MySQL-PHP) stack as I think is the best stack for hosting static HTML and WordPress websites.
Let’s begin…
1- Generate CSR Code for your website
openssl req -new -newkey rsa:2048 -nodes -keyout sitename.key -out sitename.csr
*please change sitename to your actual sitename
CSR Information Details
- Common Name (the domain name the Certificate will be issued for)
For example – example.com
Note! For Wildcard certificates, the Common Name should be represented with an asterisk in front (e.g. *.example.com). - Country (two-letter code)
Country (C) – the two-letter code of the country where the company or applicant is located (for example, GB for Great Britain or US for the United States; you can check your country code here.) - State (or province)
State (S) – the state, county or region the company or applicant is located in (e.g. California). - Locality (or city)
Locality (L) – the city where the company or applicant is located - Organization (your company name. Feel free to put “NA” here )
Organization (O) – the officially registered name of the organization that is applying for a certificate (e.g. Palmstack). For Organization and Extended Validation certificates, Certificate Authorities will be verifying the submitted organization. - Organizational Unit (department. Feel free to put “NA” here)
Organization Unit (OU) – the name of the department or division within the submitted organization (e.g. SSL Support). - Email address (put a valid email address here)
Email Address – an email address of the company or the applicant. This field is optional. - Challenge Password and Optional Company Name – please do not use challenge password and leave Optional Company Name field empty too. These values are now obsolete and may cause issues with getting the SSL certificate.
Now after writting this command press enter so your CSR files will be generated and saved in the folder where you ran the command in named sitename.csr and sitename.key you can access this folder via FTP client
Please download those two files to a folder and call it SSL-cert
2-Certificate Activation
After your SSL purchase (in my case i purchase all my SSL certs from Namecheap), activate your certificate in order to make it work for your website.
I will show you the process on Namecheap from which I purchased my SSL certificate but I think it will be the same or close for any issuer.
lets begin the process..
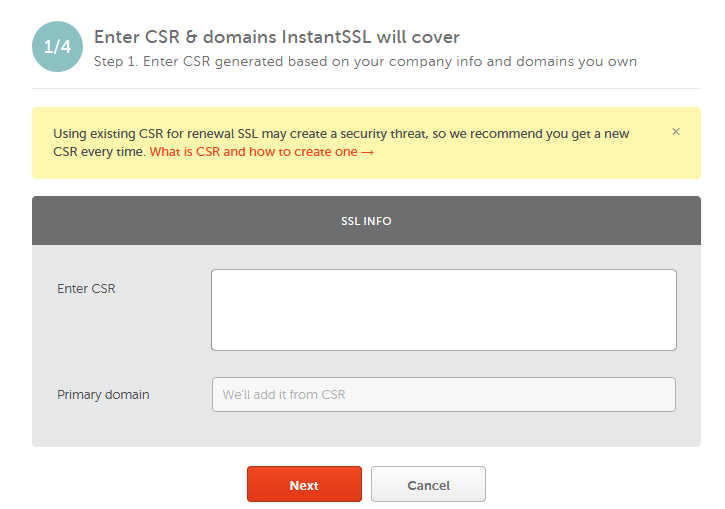
- Once purchased the SSL certificate click on Activate button on the right

- Enter (or copy-and-paste) your CSR code and click Next.
- On the next page, select the Domain Control Validation method (DCV) to confirm your domain ownership from the drop-down list.
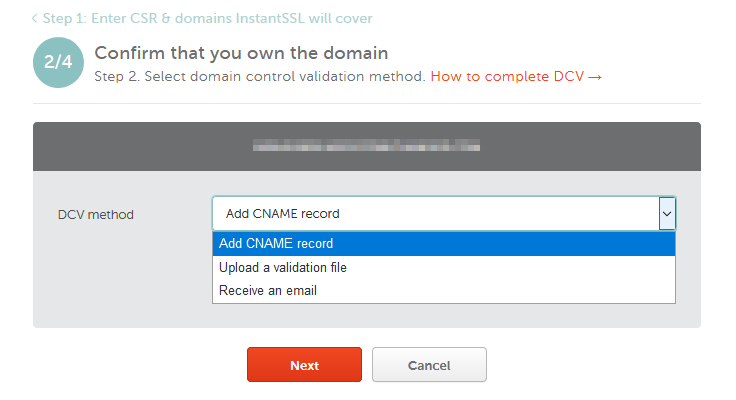
“For the CNAME-based method, you’ll need to create a special record in your domain DNS. This CNAME record will be provided after the activation.
For the file-based validation, you will need to upload a certain text file into a particular directory of your website (/.well-known/pki-validation/) to have the certificate issued. You’ll then be able to download the certificate file in your account after the order is submitted to the Certificate Authority for activation. This method is not available for Wildcard SSLs.“
- On the next step, enter the email address you would like to receive an SSL certificate to and proceed further.
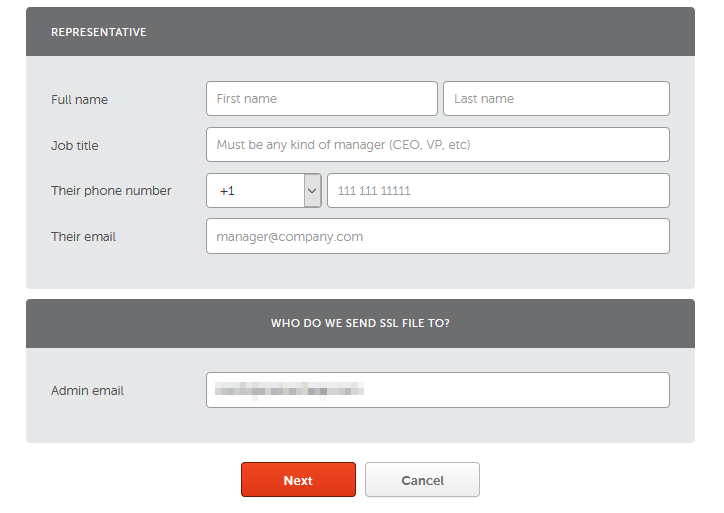
“Important: Please ensure to specify the officially registered business email address for the company in the “Representative” section.
Note: Administrative contact email cannot be changed later, however, issued SSL can always be downloaded from the Namecheap account.“
- Review information and click Submit to confirm your certificate request
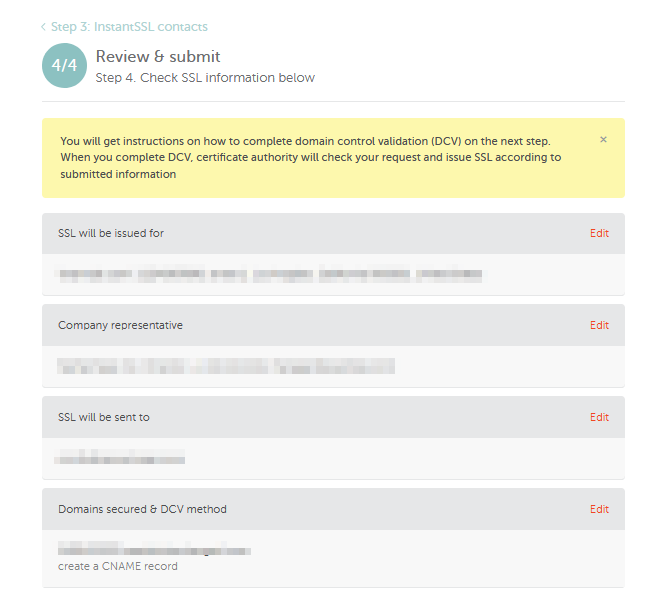
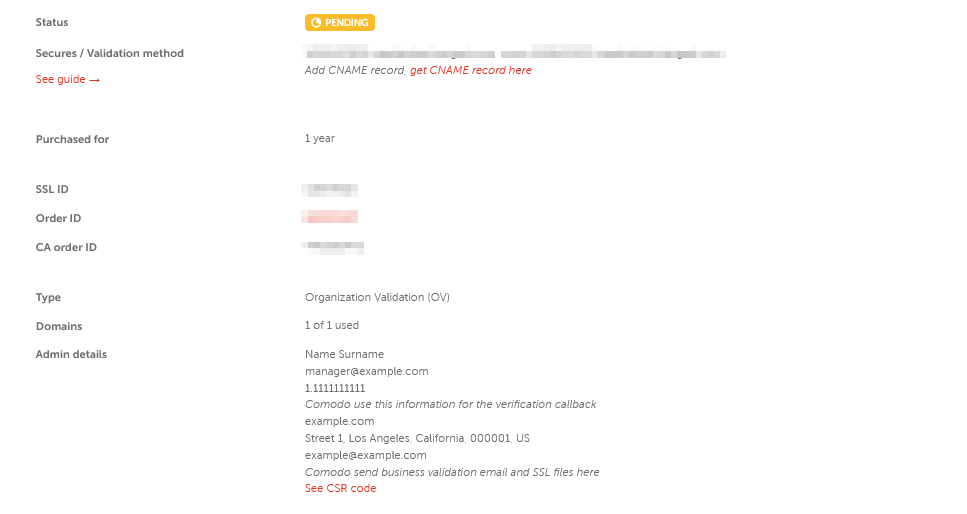
- Once done, go to the certificate Management page, where you can view the Order ID, Certificate Authority’s order ID (‘CA order ID’), and other details of the certificate.
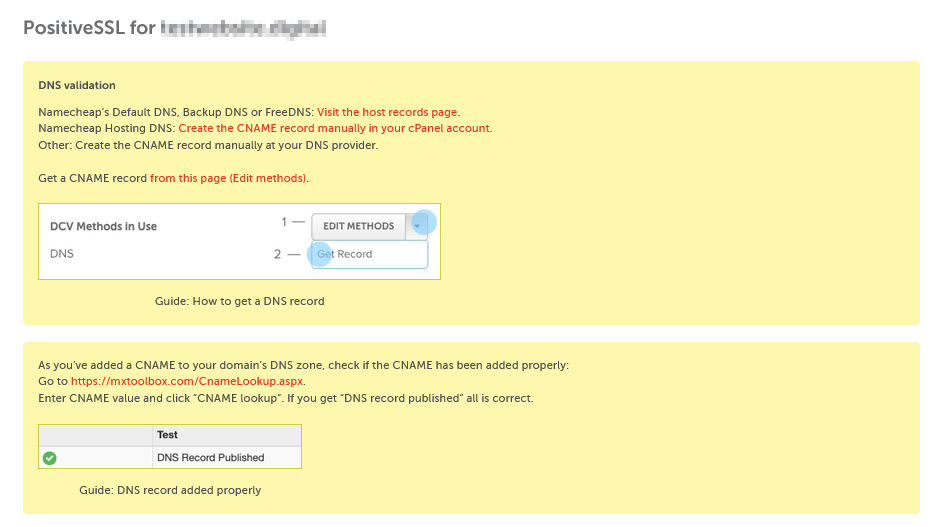
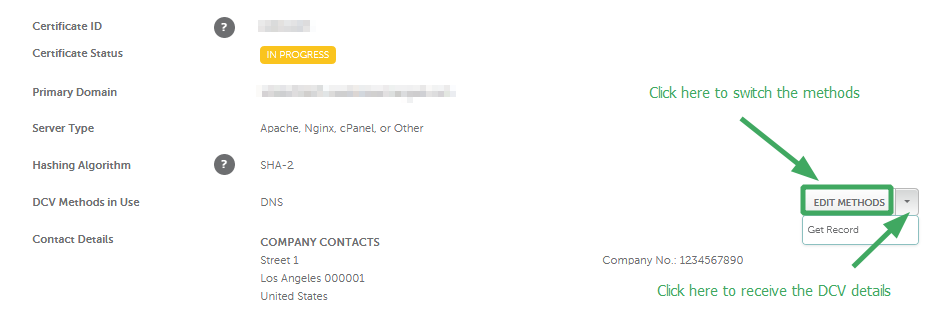
“Note: You’ll see the instructions on how to switch between the DCV options in the yellow panel at the top of the page. Use the corresponding link to go to the ‘Edit methods’ page.
By clicking the from this page (Edit methods) link, you’ll be redirected to the page where you can review certificate-related information and switch the DCV options.”
3- Preparing the certificate
- Now, once your received the .zip certification files from Namecheap/Comodo you will find two files sitename.bundle and sitename.crt
- Using Notepad or any text editor open the .crt file it should look something like this

starts with “- – -BEGIN CERTIFICATE- – -” and ends with
“- – -END CERTIFICATE- – -“
- Now using Notepad or any text editor open the .bundle
- Now copy all the text from the .crt file and paste it on the top most of the .bundle file, so the .bundle file now have 3 certificates
- Save the .bundle file as sitename.crt file and move it inside the SSL-cert folder that we created before which contain the sitename.key file also
4- Uploading to your hosting server
- Using the FTP client now browse to /var/www/yoursite.com and create a new folder with the name certs
- now upload the sitename.crt and the sitename.key file from the local folder SSL-cert to the folder cert you just created
5- Install on your website
- Using the FTP client now browse to /etc/nginx/sites-available/ and open the file yoursite.com using any text editor
- now add the following server block code after the already available server block code that had the listen 80; line
server {
    listen 443;
    server_name yoursitename.com   www.yoursitename.com;

    root   /var/www/yoursitename.com/htdocs;
    index  index.php index.html index.htm;

    ssl on;
    ssl_certificate     /var/www/yoursitename.com/cert/sitename.crt;
    ssl_certificate_key /var/www/yoursitename.com/cert/sitename.key;

}- Now save the file and restart Nginx using this SSH code
sudo systemctl restart nginxThat’s it … Congratulations! you have just installed the SSL certificate to your Nginx hosted website.
have a good Day 🙂